- Open the box and check the equipment and power it up. See if there are any abnormalities and install the equipment.
After powering up the machine, it will automatically switch on and enter the welcome screen.

Figure 2- 1 Welcome screen
*Tips: Please connect to a 110V power supply, please ensure that you use the original adapter If the power supply is too large there is a safety hazard
2. Register your employees' attendance information profile. Employees can start taking attendance.
Steps1: Select Menu > User > Enroll.
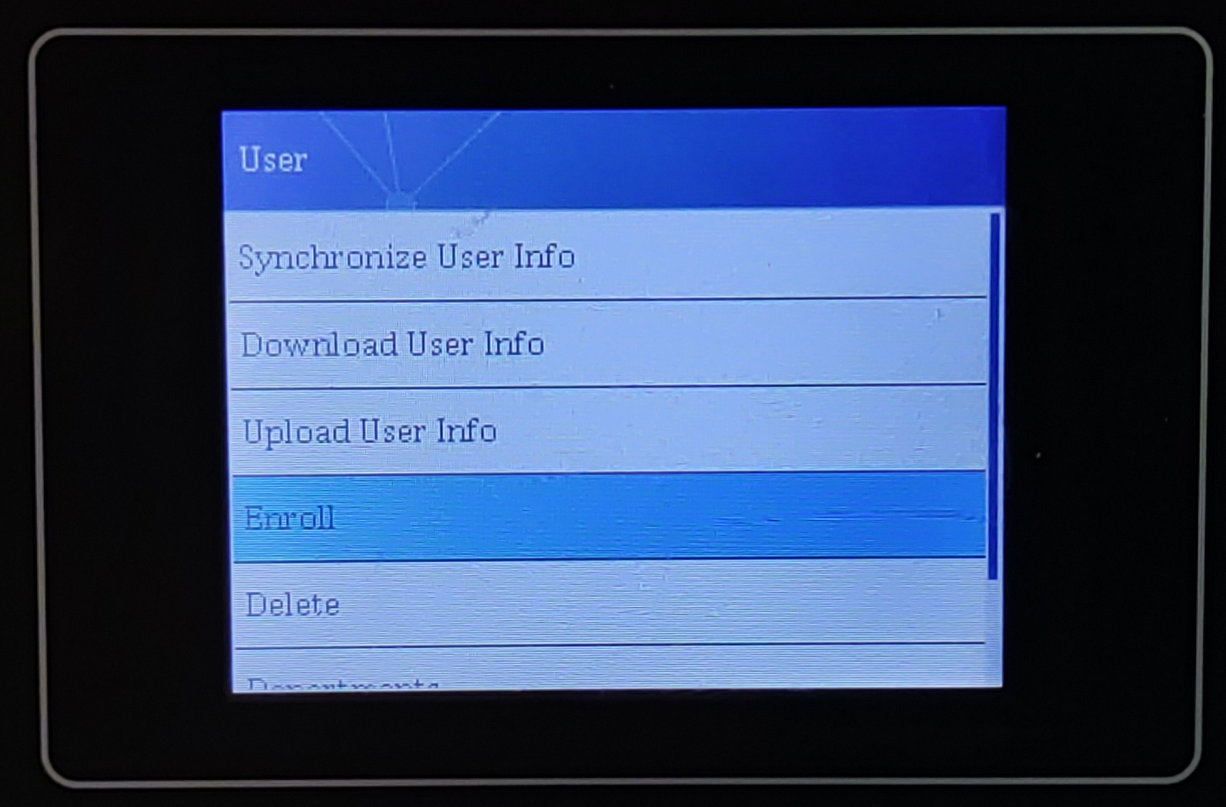
Figure 2- 2 Employee register
Step 2: Enter Employee User ID, Name, Dept.
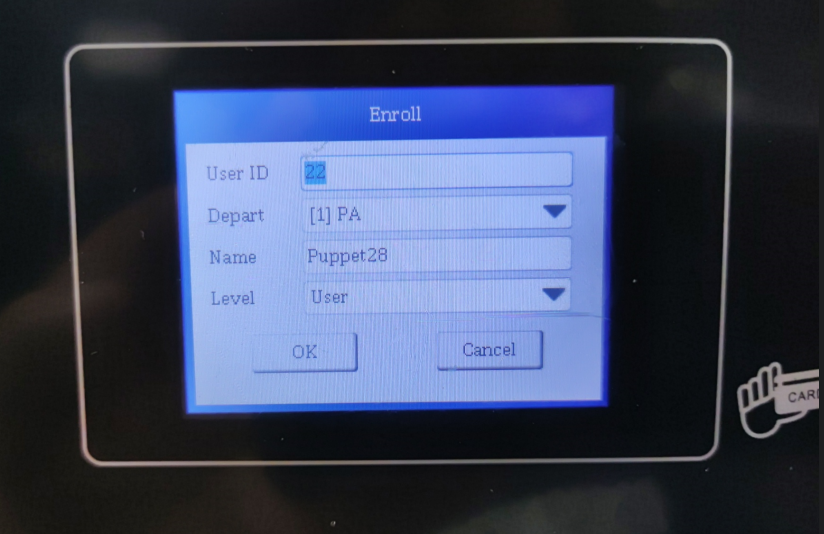
Figure 2- 3 registration interface
*Tips: Please note that setting Manage&Admin Level will cause the machine to enter admin mode, requiring an admin to enter information to access the menu.
Step 3: Fingerprint, password, and ID Card can be entered for employees.
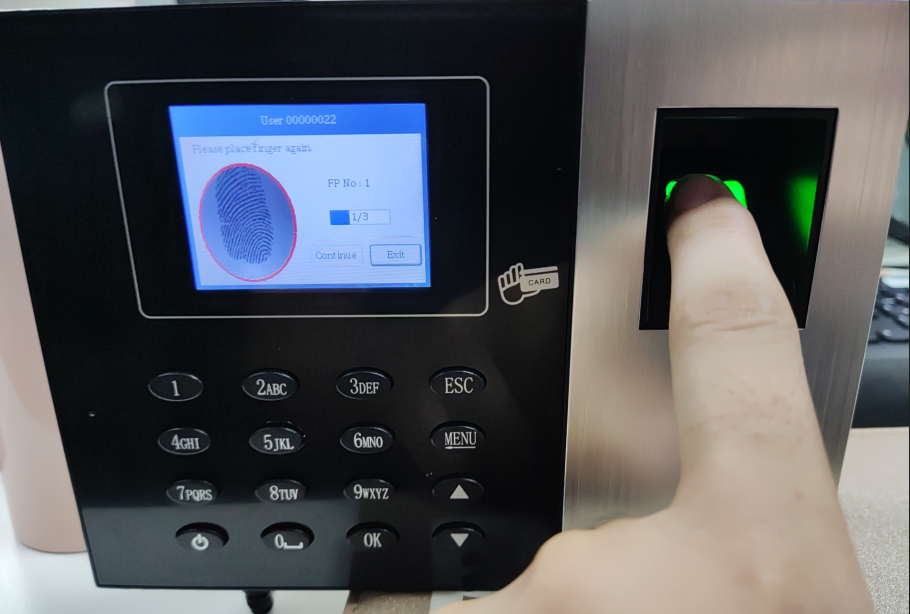
Figure 2- 4 Fingerprinting
*Tips: Due to the different shades of fingerprints, some people may not be able to record their fingerprints perfectly. Please try changing to another finger or choose to use an ID card or password for attendance.
3. Set attendance shifts.
Steps1: Take out the USB stick from the package and insert it into the attendance machine.
Figure 2- 5 Insert the USB stick
Steps2: Go to MENU > Attendance Settings >Attendsettings Download(download time sheets). When finished, unplug the USB stick and insert it into your computer.
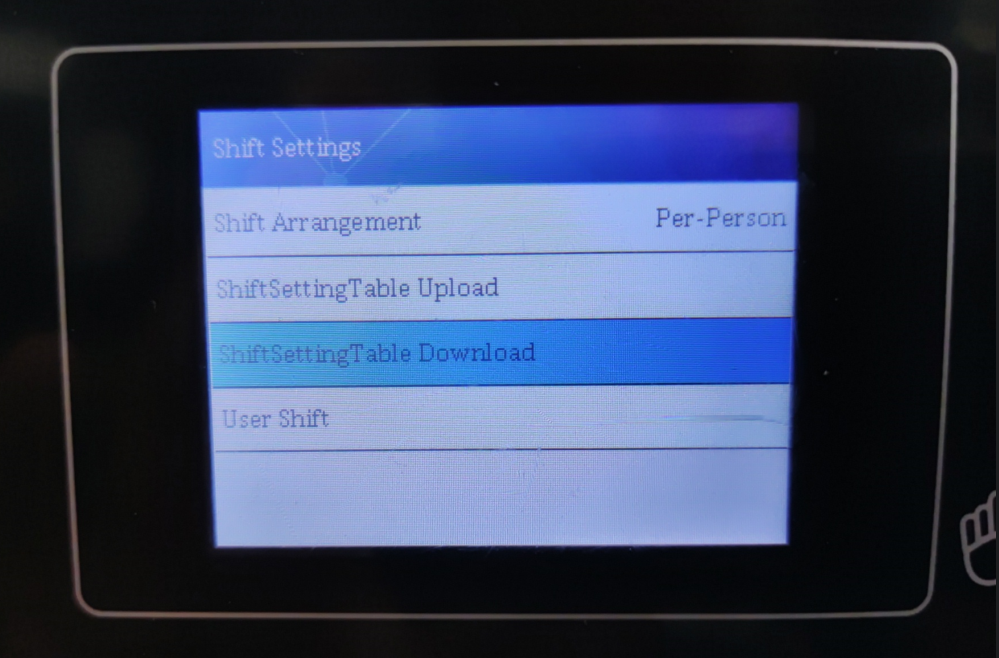
Figure 2- 6 Attendance Schedules Download
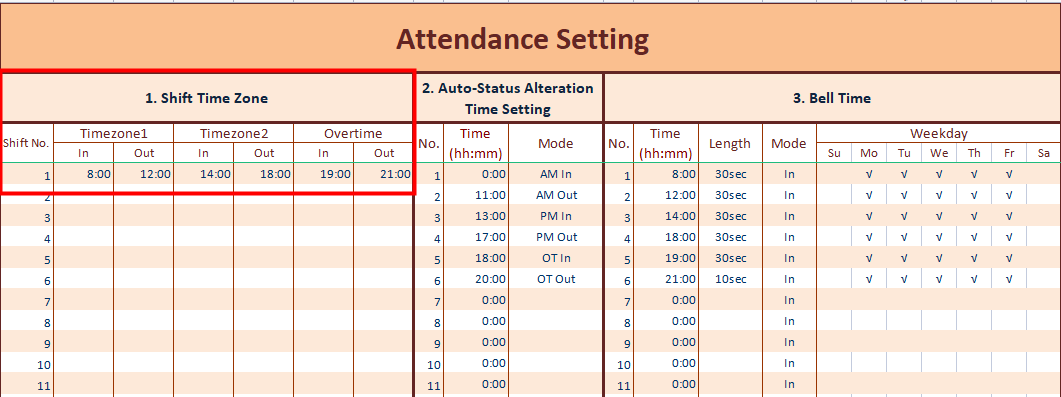
Figure 2- 7 Set scheduling times
Shift Time Zone: The main functions are to set the start time, end time, and overtime. A total of 26 shifts can be set, each shift corresponding to Shift no (typesetting number), Timzone1 for AM, and Timezone2 for PM.
Auto-Status Alteration Time Settings: Auto-conversion of shifts on the main screen to automatically determine whether the time period is office hours or off-hours.
For example: if you set 0:00 as AM IN and 11:00 as AM OUT, the interval from 0:00 to 11:00 will be AM IN time and will be automatically adjusted to AM IN records even if adjustments are made.
Bell Time: The ringing time for the prompt to open, 30sec is 30 seconds
Please remember to save when you have completed the form
Steps3: Go to MENU > Attendance Settings >Attendsettings Upload.
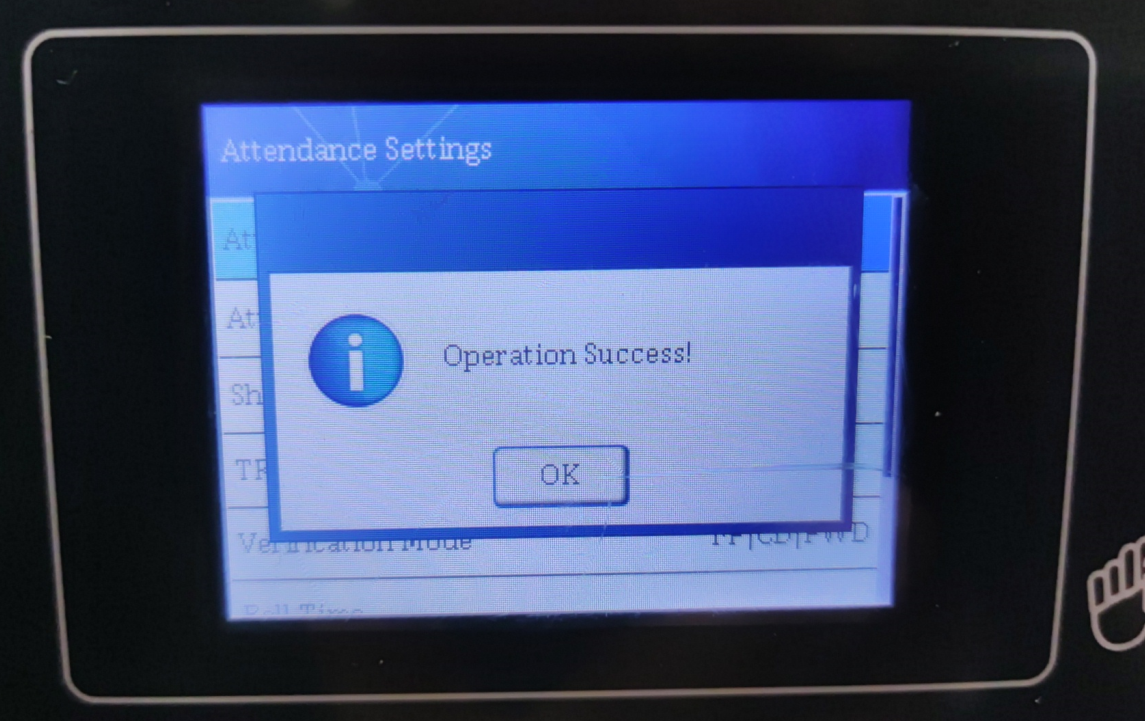
Figure 2- 8 Finish uploading
4. Set and assign attendance rules for employees.
Steps1: Take out the USB stick from the package and insert it into the attendance machine.
Steps2: Go to MENU > Shift Settings > ShiftSettingTable Download When finished, unplug the USB stick and insert it into your computer.
Figure 2- 9 Staff Assignment Schedules Download
Steps3:Set up forms according to actual needs.

Figure 2- 10 Assigning scheduling schedules
*Tips: 1 for Shift No1. This employee will be on schedule No 1.
Steps3: Go to MENU > Attendance Settings >Attendsettings Upload.
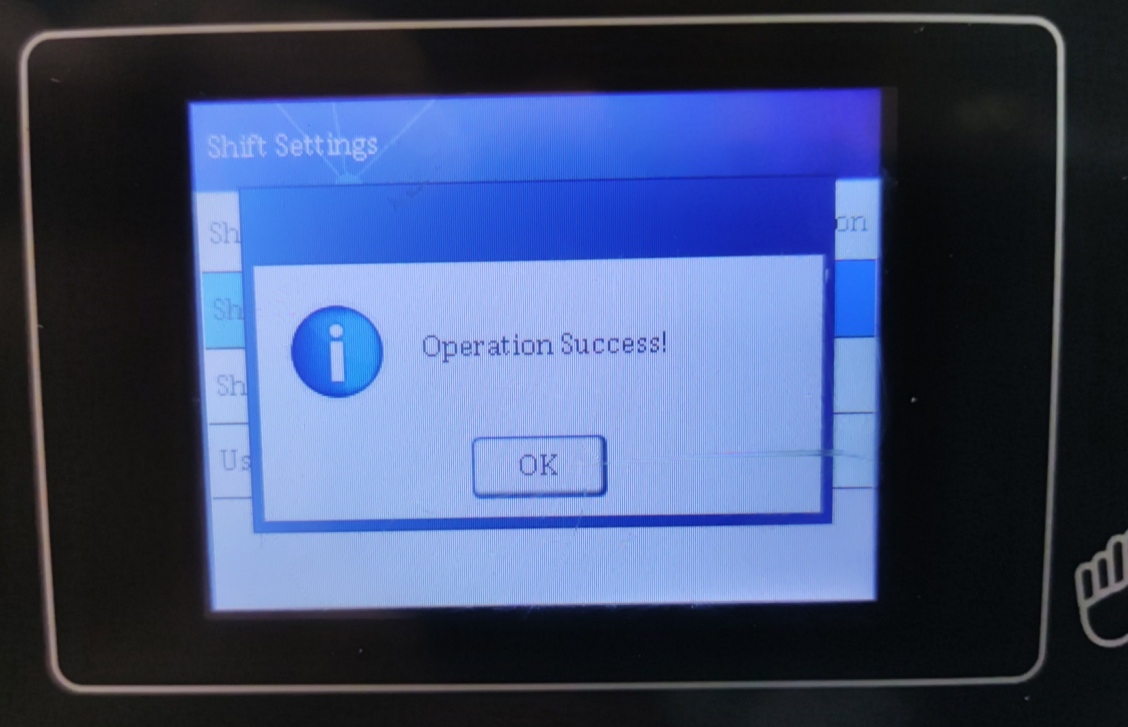
Figure 2- 11 Complete upload
*Tips: If you have any questions about the setup, you can send the form to our technical engineers and we can set it up to suit your needs.
Comments
0 comments
Please sign in to leave a comment.